Category Archives: Uncategorized

Winter Squash is Here

New York’s recent summer-like weather may have hidden the change in seasons, but the selections at farmers’ markets across the state make it clear that autumn is here. Stalls are laden with apples, jugs of cider, dried corn stalks, and the dark greens, pale yellows, creams, and oranges of winter squash. Though technically fruit but referred to as vegetables, they are versatile, high-fiber, low-calorie options that add a fresh touch to any fall comfort meal and, if stored properly, last for months.

Here are a few of the most popular varieties:

Acorn squash are round, generally small, and have thick dark green and orange skin. Its flesh is orange-yellow and has a slightly nutty taste. Look for specimens with firm skins free of soft spots or blemishes. Store in a cool, dark place for up to a month. It can be baked, roasted, steamed, sautéed, and even cooked in the microwave.

Buttercup squash is squat and round. Its rind is dark green and marked by green-gray markings; there is a round ridge on its bottom. Many say that its bright orange flesh is the sweetest of any of the winter squashes, though it can be dry so it’s best to steam or bake it. Choose a squash that’s heavy for its size, with even coloring. Avoid squashes with blemishes, soft spots, or dull skin. While buttercup doesn’t store as well as some squashes — no more than one month stored in a cool, dry spot, once cooked, it freezes well for use throughout the winter months.

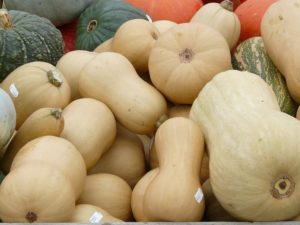
Butternut squash is shaped like a pear. Its exterior is smooth with cream-colored skin. Slice it open and there’s a deep orange flesh; seeds are found only in the ‘bell’ of the squash, with the ‘neck’ all flesh. It has a light, sweet flavor. Look for a squash that is heavy for its size; the skin should be firm and free of bruises, brown spots, or cuts. If stored correctly, butternut can be stored for months.  This is a squash for almost any use — baking, roasting, and in cube for sautéing. Mash it for a puree and make a great soup!

Spaghetti squash is a great low-carb alternative to pasta. When cooked, the moist flesh develops strands that resemble spaghetti, with a light flavor that lacks sweetness and a tender, chewy texture. Roast or steam the squash, scrape out the strands, mix with your favorite tomato sauce and eat like pasta. Look for a cylindrical shape with a firm exterior that ranges in color from pale cream to bright yellow. Can be stored for up to one month.


Here’s a salad recipe that uses winter squash from delish.com;

Ginger-roasted Winter Squash Salad

INGREDIENTS
½ c. water
¼ c. sugar
½ c. red wine vinegar
1 stick cinnamon
¼ c. dried currants
2½ lb. thick-fleshed acorn squash
1 tbsp. extra-virgin olive oil
coarse sea salt, ground pepper
1 piece fresh ginger
2 tbsp. Crème fraîche

DIRECTIONS
Preheat the oven to 325 degrees F. In a small saucepan, combine the water with the sugar, vinegar, and cinnamon, and simmer for 5 minutes, stirring until the sugar dissolves. Add the currants and simmer for 3 minutes, then remove from the heat.

Meanwhile, line a baking sheet with aluminum foil. Rub the squash with the olive oil and season with salt and pepper. Using a fine grater, grate the ginger over the cut sides of the squash and rub it into the flesh.

Transfer the squash to the prepared baking sheet, cut side down, and roast for about 15 minutes, until the squash starts to soften. Turn the squash cut side up and roast for about 17 minutes longer, until tender; transfer to a work surface and let cool slightly.

Increase the oven temperature to 425 degrees F. Cut the squash into 1 1/2-inch-thick wedges. Lightly rub the foil with oil and arrange the squash on the baking sheet; roast for about 25 minutes, turning once halfway through, until golden and crisp along the edges.

Arrange the squash on a platter with mixed greens. Discard the cinnamon stick from the currants and add the currants to the squash. Drizzle with the pickling liquid and crème fraîche, and serve.

Photo CreditHans Via Pixabay

It’s Pumpkin Season!

We have a love affair with the pumpkin! No other fruit or vegetable matches how the pumpkin has become a part of our autumn culture. Coffee, creamer, cookies, crackers, even cake mix for dogs. Come autumn almost anything you can eat is pumpkin-flavored. And if you can’t eat it, you can smell spiced pumpkins in candles and cleaning products. It’s been a long-term relationship, dating back to when colonial cooks in the 1600s discovered that this vegetable had dessert possibilities.

There are more than 40 varieties of pumpkins and all are edible; however, some are better for Halloween carving and decorating, others for cooking and baking. Spend some time with the grower at your famers’ market to learn a little about the different kinds of pumpkins for sale. And yes, you can just go to the grocery store and buy canned pumpkin puree to make your pies, muffins or soup, but what’s the fun in that? Using fresh pumpkin isn’t all that difficult.

Look for the small pumpkins to use for cooking — they’re usually marked as “sugar pumpkins” or “pie pumpkins.” A two-pound pumpkin will give you about two cups of puree, the amount you’ll need for a 9-inch pie. You can cook the pumpkin by roasting or steaming it. To roast, slice it in half (or leave it whole), put it in a 350-degree oven for 60 to 90-minutes. Scoop out the flesh, then puree it until smooth in a blender. Cooked pumpkin freezes well, so be sure to save any extra. But don’t limit your pumpkin experiences to just pie. Don’t forget pumpkin bread, muffins and cookies. And if you’re really adventurous – try pumpkin ice cream! It’s delicious!

Our thanks to www.blessthismess.com for our Fresh Pumpkin Pie recipe!

Pumpkin Pie From Fresh Pumpkin

Ingredients

  • Homemade Pumpkin Puree from 1 to 2 small sugar pumpkins (see notes), about 4 cups
  • 1 can sweetened condensed milk (14-ounce)
  • 1/2 cup heavy cream
  • 2 tablespoons cornstarch
  • 2 tablespoons molasses
  • 2 tablespoons canola oil
  • 1 tablespoon ground cinnamon
  • 1 teaspoon ground ginger
  • 1/4 teaspoon salt
  • 3 large eggs
  • 1 unbaked 9 inch pie crust

Instructions

  1. To prep your pumpkins cooking them in the slow cooker is the easiest and best way to cook them. You can find full pumpkin cooking instructions here. You can do this a few days in advance if you need to.
  2. Preheat the oven to 350 degrees. Bake your prepared pie crust for 12 minutes.
  3. While the crust is cooking make your filling. Add your pumpkin puree (about 4 cups) to the bowl of your food processor. Process until smooth. Add the rest of the ingredient and process to combine well, about 1 minute, scraping down the sides as needed.
  4. When the pie crust has cooked for 12 minutes, remove it from the oven. Carefully pour in the filling, return the pie to the oven, and bake for an additional hour. Remove the pie from the oven and allow to cool on a rack for 30 minutes.
  5. Serve at room temperature or cold with fresh whipped cream.

Photo Credit127071 Via Pixabay

Apple Time in New York!

Each year, New York State’s nearly 700 apple orchards produce 29.5 million bushels of apples! You see them at your farmers markets — baskets of red, yellow, and green fruit, two dozen different varieties. Among the most popular are Empire, McIntosh, Golden Delicious, Cortland, and Gala. With all the options to choose from, how do you know which ones to use for pies and which kind makes the best eating? This is a great time for you to talk with the growers at the market about their recommendations!

To help you with that conversation, here’s a guide  from the New York Apple Association:

Braeburns are a little like Granny Smiths, with a sweet, yet tangy flavor. They are excellent for cooking and they hold up well in cold storage. Look for these to be available late in September and early October.

Cortland is an all-purpose apple and a true New Yorker — it was developed at the NYS Agricultural Experiment Station in Geneva, New York in 1898! It’s juicy and sweet, with just a bit of tartness. Its flesh stays white after cutting, so it’s excellent for use in salads. Use Cortlands for sauce, baking, and pies; slice and freeze now for baking over the winter months.

Crispins were first grown in Japan and were introduced in New York in 1948. A cross between Golden Delicious and Indo apples, they are crunchy, excellent for eating, making apple sauce, and baking.

Idareds may have been developed in Idaho, but it’s a cross between two apples that were first grown in New York’s Finger Lakes region in 1791. Use them for all kinds of cooking — sauce, baking, cooking, and pies. Idareds look as good as they taste, as they hold their shape and look beautiful in bowls on counters and table centerpieces.

McIntosh are a long-time favorite. It’s great for eating and because it has a tender flesh, it cooks down quickly for a great apple sauce.

Baking Tips:

  • Blend tart and sweet apple varieties for great pies with a variety of textures.
  • Keep slices uniform in size for pies and crisps for even baking; chop smaller pieces for breads and muffins.
  • 1 pound of apples – 2 large, 3 medium, 4 or 5 small; 3 cups peeled and sliced apples

Classic Apple pie recipe from the New York Apple Association’s website: www.nyapplecountry.com

For 8 people, a two-crust, 9-inch pie

Ingredients

  • 6 cups New York State apples thinly sliced and peeled
  • 1/4 cup of sugar
  • 2 tablespoon(s) flour
  • 3/4 teaspoon(s) cinnamon
  • 1/4 teaspoon(s) salt
  • 1/8 teaspoon(s) nutmeg
  • 1 tablespoon(s) lemon juice

Combine all filling ingredients in a large bowl. Mix lightly.

Heat oven to 425º.

Use your favorite pie crust whether it’s a treasured family recipe or the quick and easy refrigerated pie crusts available in the supermarket.

  • Prepare pie crust and place crust in pie pan, pressing firmly against sides and bottom.
  • Trim crust evenly with the pan edge.
  • Fill pie crust and place second crust over filling.
  • Wrap excess top crust under the bottom crust edge. Press edges together to seal and flute.
  • Cut slits in top crust. Cover edge of crust with strips of foil for the first 25 minutes of baking.
  • Bake for 40-45 minutes or until crust is golden brown

Photo CreditHans Via Pixabay

Preserve the Harvest

The growing season may be over, but that doesn’t mean you’ll have to do without the fresh fruits and vegetables you’ve bought all summer at your farmers’ market. There are several ways you can save them and enjoy them throughout the winter.

Freezing is the easiest, quickest, and safest way to preserve vegetables, though it doesn’t work for all types. Asparagus, broccoli, green beans, peppers, summer squash, and dark leafy greens freeze well, and if you cut it off the cob, so does fresh corn. Use the freshest veggies possible and make sure they’re free of any damage and wash them. It’s best to blanche the vegetables before freezing, to preserve their quality by destroying the enzymes that destroy taste and color. To blanche, bring a large pot of water (at least a gallon for each pound of vegetables) to a boil, add the clean and trimmed veggies to the pot and check for doneness after a minute. When they are done, remove them from the pot and put them into an ice water bath to stop the cooking process. Let them cool and dry them well.  Pack them into freezer bags — the heavy-duty kind are best — and force out as much air as you can. Pack them into the freezer but be careful not to crowd them.

When you’re ready to use them, you don’t even have to thaw the vegetables. Just drop them into your stir-fry, casserole or soup and cook as usual. A short time in the microwave will make them ready to eat. Be careful not to overcook or you’ll find those crisp veggies will end up soggy.

Another option is to can vegetables using the hot water bath method. This method of preserving foods dates to the 1800s, when Napoleon sponsored a contest to discover a means of preserving large amounts of food so that he could feed his troops while on the march. The winner was Nicolas Appert who heated food to a certain temperature, killing the germs that cause spoilage. The heat also forced air out of the jar so that it sealed the lid.

Canning works best with high acid vegetables, so it’s especially good for tomatoes; beans, beets, and carrots are also good for canning. You’ll need some equipment, including a kettle wide and deep enough to hold several canning jars and enough water to cover them; canning jars, and lids. It’s important that you closely follow all directions for water bath canning; check with Cornell Cooperative Extension for canning instructions and canning classes in your area.

Photo Credit: Meditations Via Pixabay

What’s with All the Zucchini?

You see it almost everywhere — chances are there’s more than one stand at your local farmers’ market that has piles of zucchini, that light to dark green summer squash that can grow 2 to 3 feet long and 8 to 10 inches in diameter! But bigger isn’t always better when it comes to zucchini!

For a tender, juicy fruit (yes, zucchini is a fruit!) select one that is about six to eight inches long —large zucchini has less flavor and more water, and the seeds are large. Look for an even color, and the darker green the better; the deeper the color, the deeper the flavor. The skin should be glossy and you want the zucchini to have a slight stem on the end. Don’t store zucchini in a plastic bag because it can make the fruit slimy. Instead, opt for a brown paper bag and store it in the vegetable bin of your refrigerator.

So, why is there so much zucchini? It’s easy to grow. It can grow in almost any soil and it flowers more than most other plants. Each of those blossoms that are pollinated grows into another new zucchini. It also has a long growing season; if you pick one zucchini off the vine, the vine just grows another squash. Over the course of one growing season, one plant can produce six to 10 pounds of zucchini!

There are almost as many recipes for how to cook zucchini as there are zucchini; an internet search shows sites that offer “36 things to do with zucchini,” “49 Sensational Zucchini Recipes,” even “80+ Best Zucchini Recipes.” You can fry it, bake it, stuff it, grill it, spiral it to use as a low-carb pasta substitute, make it into fritters, use it for manicotti, even make loaded zucchini skins.


If your kids aren’t zucchini fans (or fans of vegetables, in general), zucchini bread is a great way to make a tasty snack a little healthier. This receipe is from www.butterwithasideofbread.com

Best Ever Zucchini Bread

  • 1 cup white sugar
  • 1 cup brown sugar
  • 3 eggs
  • 1 cup vegetable oil (you can substitute applesauce for ½ the oil)
  • 3 teaspoons vanilla extract
  • 3 cups all-purpose flour
  • 1 tsp nutmeg
  • 3 teaspoons ground cinnamon
  • 1 teaspoon baking powder
  • 1 teaspoon salt
  • 1 teaspoon baking soda
  • 2 cups grated zucchini (you can add a little more, I always do!)
  • 1 cup chopped walnuts
  1. Grease two 8 x 4 inch bread pansor 6 mini loaf plans. Preheat oven to 325 degrees F.
  2. Assemble your ingredients. Mix flour, salt, baking powder, soda, nutmeg and cinnamon together in a bowl.
  3. Beat eggs, oil, vanilla, and sugar together in a large bowl. {I always sneak in a few spoonfuls of flax!}
  4. Add dry ingredients to the egg mixture and stir until combined.
  5. Grate zucchini.  Stir into the mixture along with the nuts until well combined. Pour batter into prepared pans.
  6. Bake for 40 to 60 minutes, or until tester inserted in the center comes out clean. My mini-loaf pans take about 35-40 minutes. Large sized loaves take about 55 minutes.
  7. Cool in pan on rack for 20 minutes. Remove bread from pan, and completely cool. Enjoy!

Photo Creditauntmasako Via Pixabay

It’s Tomato Time!

There’s a benefit to the fact that its late summer — it’s tomato harvest time! But with more than 25,000 varieties available, you may have trouble picking the right type. The following are most likely to be at your farmers’ markets:

Beefsteak tomatoes are great for eating — think on a bacon, lettuce and tomato sandwich or a hamburger. They’re also good for adding to green salads or for just plain snacking. Try eating a juicy beefsteak the way you would a peach or an apple!

Roma, or plum tomatoes are the variety you want to use for cooking because they don’t have a lot of seeds and their skins are thin. They also are meatier than round tomatoes, so they won’t water down your favorite pasta sauce recipe.

Cherry tomatoes have the shape and size of a cherry. They are often sweet, so pop them into a salad or your mouth — they make great low calorie, low sugar snacks (watch out if you bite into them — they squirt!). Slice cherry tomatoes in half and drop them into a saute pan for a quick-cooking sauce.

Grape tomatoes have the oblong shape of a grape and are about the same size. Their skin is a little thicker than cherry tomatoes and their flesh is meatier. Many people feel they are sweeter than the cherry variety. They are growing in popularity because they last longer than cherry tomatoes.

Heirloom tomatoes certainly aren’t the prettiest tomato variety on the market, but they are the tastiest. Heirlooms vary in size and they come in a range of colors — yellow, pink, red, purple, green, orange, and even black. There are said to be more than 3,000 varieties of heirlooms being grown in the U.S. and more than 15,000 known varieties!

Look for plump, heavy tomatoes with smooth skins that don’t have any cracks. They should ‘give’ a little with slight pressure. If you plan to use them within a few days, you can keep them on your kitchen counter or windowsill, but not in direct sunlight! If it will be a few days before you use them, find a cool spot in the house. Never refrigerate tomatoes — it makes them watery and it ruins the flavor.

Take advantage of fresh tomatoes for their taste and for their health benefits. Eating tomatoes lowers cholesterol and blood pressure, reduces the risk of prostate cancer, and regulates blood sugar.


Easy Fresh Tomato Sauce
www.allrecipes.com

Ingredients:
4 tablespoons olive oil
1 onion, chopped
3 tomatoes, chopped
1 tablespoon tomato puree
salt and pepper to taste

Directions:
In a large skillet over medium heat, cook onion in olive oil until translucent. Stir in tomatoes, cook until juice begins to thicken. Stir in puree, salt, and pepper. Reduce heat and simmer 15 minutes more, until rich and thick.

Photo CreditCouleur Via Pixabay

Storing Fresh Produce

You’ve just come home from the farmers’ market and now you need to know how best to store them.

Most leafy veggies like kale, spinach, escarole, and chard as well as broccoli should be used within three to five days. You’ve got five to seven days to use arugula, bell peppers, green beans, zucchini, and summer squash (all of which you can find at the market right now!) You’ve got more time to use up cabbage, carrots, turnips, and beets, as they have a shelf life of two weeks or more.

A few tips for storing your fresh treasure:

  • Store fruits and vegetables separately; some foods can make other fruits and vegetables ripen or rot faster
  • Keep broccoli, cauliflower, and cucumbers away from other produce
  • Wash your leafy produce and dry well; wrap in a dish towel or paper towel, and put in a plastic bag (poke some holes in it first!) and then store in the vegetable drawer
  • Remove the greens from carrots, turnips, beets, and parsnips and store them loose in the crisper drawer. But keep the greens. They are tasty too!
  • Store most other vegetables in plastic bags with holes in them

Blueberries, the Super Food!
They’re showing up at the farmers’ market now – blueberries! Loaded with antioxidants, potassium, and vitamin C, blueberries are one of the healthiest fruits you can eat. Just one-half cup of blueberries a day can lower your cholesterol and lower your risk of heart disease and cancer. They also are a natural anti-inflammatory. When buying, pick the darkest blue fruit – the darker the fruit, the more health benefits they have. Frozen blueberries are just as good as the fresh ones, so be sure to pick up extra at the market now and freeze them for later!


To get a healthy start to your day, here’s a Wake-Up Smoothie recipe from the eatingwell.com test kitchen:

Ingredients:
1¼ cups orange juice, preferably calcium-fortified
1 banana
1¼ cups frozen berries, such as raspberries, blackberries, blueberries and/or strawberries
½ cup low-fat plain yogurt

Directions
Combine orange juice, banana, berries, and yogurt in a blender; cover and blend until creamy. Serve immediately.

Photo CreditFree-Photos Via Pixabay

Cut Down on Salt and Sugar – Shop Farmer’s Markets!

We get most of our salt from processed and restaurant foods, so the best way to reduce the salt in our diets is to eat fresh – and it’s easier than ever to find fresh produce at your neighborhood farmers’ markets! With everything from beans to zucchini being harvested right now, and many markets offering fresh meat, poultry and fish, you can avoid sodium-heavy canned and packaged foods for an entire week – just don’t add any salt while you’re cooking. Try adding some fresh herbs such as basil and rosemary for seasoning. When you add fresh fruit for dessert, you avoid all that processed white sugar that can add unnecessary calories to your diet – and add unwanted pounds to you.


Here’s a recipe for a French vegetable stew that uses lots of things you can find at the market:

Summer Vegetable Ratatouille*

Ingredients

  • 2 onion, sliced into thin rings
  • 3 cloves garlic, minced
  • 1 medium eggplant, cubed
  • 2 zucchini, cubed
  • 2 medium yellow squash, cubed
  • 2 green bell peppers, seeded and cubed
  • 1 yellow bell pepper, diced
  • 1 chopped red bell pepper
  • 4 roma (plum) tomatoes, chopped
  • 1/2 cup olive oil
  • 1 bay leaf
  • 2 tablespoons chopped fresh parsley
  • 4 sprigs fresh thyme
  • salt and pepper to taste

Directions

  1. Heat 1 1/2 tablespoon of the oil in a large pot over medium-low heat. Add the onions and garlic and cook until soft.
  2. In a large skillet, heat 1 1/2 tablespoon of olive oil and saute the zucchini in batches until slightly browned on all sides. Remove the zucchini and place in the pot with the onions and garlic.
  3. Saute all the remaining vegetables one batch at a time, adding 1 1/2 tablespoon olive oil to the skillet each time you add a new set of vegetables. Once each batch has been sauteed add them to the large pot as was done in step 2.
  4. Season with salt and pepper. Add the bay leaf and thyme and cover the pot. Cook over medium heat for 15 to 20 minutes.
  5. Add the chopped tomatoes and parsley to the large pot, cook another 10-15 minutes. Stir occasionally.
  6. Remove the bay leaf and adjust seasoning.

*From www.allrecipes.com

Photo CreditH3rko Via Pixabay

Peach Picking at the Farmer’s Market

Nothing says summer like fresh peaches from the farmers’ market and we’re starting to see them now. The advantage to shopping locally is that the peaches are ripe when they arrive and not picked early so they can travel hundreds of miles to the grocery store. And because the farmer is at the booth, he or she can help you pick out the best fruit there. If you still need a little help in how to select a ripe peach, there are three things to look for:

Smell
A ready-to-eat peach will have a sweet smell.

Touch
A ripe peach will have a little “give” to it when you apply slight pressure. If the fruit is hard, it will need several days to ripen. Put it in a brown paper bag at room temperature.

Color
Ripe peaches have a deep yellow color that’s consistent on the fruit.


If you want to make a great dessert with fresh peaches but don’t want to heat up your kitchen by turning on the oven, Slow Cooker Peach Cobbler with Fresh Peaches and the most delicious Yogurt Whipped Cream is the perfect summer dessert! From Slow Cooker Gourmet

Slow Cooker Peach Cobbler with Fresh Peaches and Yogurt Whipped Cream

INGREDIENTS
For filling:
8-10 fresh peaches ripe but not too soft
1/4 cup brown sugar
1/4 cup flour
2 tablespoons cornstarch
2 teaspoons lemon juice
1/4 teaspoon cinnamon

For topping:
1/2 cup flour
1 cup oats
1/2 cup brown sugar
1/2 teaspoon cinnamon
1/4 teaspoon nutmeg
1/2 teaspoon salt
1 stick butter, cold

For yogurt whipped cream:
8 oz Heavy Cream
2 tablespoons powdered sugar
1 teaspoon vanilla extract
5.3 oz Whole Milk Yogurt

INSTRUCTIONS
For filling:
Peel and dice peaches into bite sized pieces
Mix with remaining filling ingredients
Spray slow cooker with non-stick cooking spray and add peach filling (I used a 2.5 quart mini casserole slow cooker but any 3-5 quart slow cooker will work)

For topping:
In a large bowl stir together all topping ingredients except butter until combined
Cut cold butter into tiny pieces and then use a large fork to cut the butter into the topping mixture until crumbly
Add the topping to the filling in the slow cooker and cover and cook on high for 2-3 hours until bubbling and oats in the topping are tender

For yogurt whipped cream:
In a large bowl using hand mixer or in a stand mixer beat heavy cream with sugar and vanilla for 3-4 minutes or until cream forms stiff peaks that hold when removing beater
Add yogurt and beat again until just combined
Serve warm cobbler with fresh yogurt whipped cream

Corn – All You Need to Know!

It’s mid-August and throughout New York State, that means home-grown corn season! From sweet to super sweet, from the tender, white kernels of Silver Queen to the yellow and white of Butter and Sugar, farmers’ markets are offering a range of varieties, colors and sugar levels. Which type is better is purely a matter of taste, but because those kernels are hidden behind layers of husk, it’s not always easy to pick the freshest ears. Shopping at a farmers’ market can help because the people who grow it are right there to answer your questions! But if you need a little help, here’s what to look for:

  • Brown tassels that are sticky to the touch. Dry, black tassels indicate an old ear
  • Bright green husks that are wrapped tight against the cob – that’s fresh!
  • Kernels that feel plump through the husk. You don’t want holes where kernels should be. And if you pull back the husk to peek at the kernels (though this shortens the shelf life!), look for plump kernels with no dents to them. The kernels should be in tight rows and have moist, pale yellow silk peeking out from the ear. If the tip of the corn is rounded to the feel through the husk, the corn is filled out. If it feels pointed, the kernels are not filled out to the tip and may be immature.
  • Avoid ears with tiny brown holes in husk. Those holes are made by worms.

There’s a debate about whether you ‘shuck’ corn or ‘husk’ it, but whatever term you use for removing the shell of leaves from the ear, don’t do it until you’re ready to cook the corn. Cobs stay fresher, longer if you keep the husk on. Store corn in a paper bag in the refrigerator to slow down the process of turning the sugar to starch, but use the corn within four to five days after purchase.

Shuck corn by peeling away all but a thin layer of innermost leaves, then peel back the leaves from the tip of the cob. Grab the tops of the leaves and the tassel in one hand and the bottom of the ear with your other hand; pull the leaves and tassel straight down in one tug. Snap off the leaves and silks from the base of the cob, clean up any remaining silk.

If you’re going to boil your corn, boil for 4 to 6 minutes in unsalted water; adding salt will toughen the kernels. If you’d like to give grilled corn a try, here’s a recipe from Bobby Flay:

Grilled Corn from Bobby Flay:

  • Heat the grill to medium.
  • Pull the outer husks down the ear to the base. Strip away the silk from each ear of corn by hand. Fold husks back into place, and place the ears of corn in a large bowl of cold water with 1 tablespoon of salt for 10 minutes.
  • Remove corn from water and shake off excess. Place the corn on the grill, close the cover and grill for 15 to 20 minutes, turning every 5 minutes, or until kernels are tender when pierced with a paring knife. Remove the husks and eat on the cob or remove the kernels.

How to Stockpile Your Produce Without the Hassle of Canning

With the outdoor farmers market season coming to an end, everyone is looking for ways to stockpile their fresh produce. To maximize your SNAP EBT benefits and utilize your farmers market produce several months from now, try preserving your produce!

The most traditional way to preserve your produce is by canning. Canning, however, can be very difficult for beginners and can be a long and tedious process. Here are three stress-free alternatives to canning that guarantee your produce’s freshness long after harvest.

1. Freezing
Freezing is a great alternative to making jam and canning if you want your produce to be accessible in the middle of the winter. You also can do it easily in your own home with a standard freezer. You can freeze fresh fruit, vegetables, and even herbs in olive oil in an ice cube tray. Full recipes here: How to Freeze Fresh FruitHow to Freeze ZucchiniHow to Freeze Fresh Herbs in Olive Oil.

2. Drying
Drying is another canning alternative that can preserve your best fruit. Although drying typically involves a dehydrator, it can easily be done in your own oven. Try drying your own fruit for your trail mix this fall. Full recipe here: How to Dry Fruit Without a Dehydrator

3. Jamming
Although jamming is still done in a can, it is a much simpler process. Making jams and preserves is a great way to reuse extra fruit and can also double as a great gift. The difference between jams and preserves comes from how they are made. Jams use mashed up fruit whereas preserves use chunks of whole fruit. Full recipe here: How to Make Jams and Preserves.


Check out what’s being picked this week*:
Pumpkin, Cauliflower, Beets, Cabbage, Broccoli, Beans, Peppers, Eggplant, Potatoes, Winter Squash, Onions, Raspberries & Collards

*Availability will vary by market due to differences in growing zones.

Recipe of the Week: Cozy up this fall with this seasonal soup recipe!

How to Use Your SNAP Benefits at the Farmers Market

Having farm-fresh produce available on a weekly basis is an excellent resource for maintaining a healthier lifestyle. Much like our grocery stores, Farmers Markets are becoming more and more accessible to everyone. Thanks to the Farmers Market SNAP Benefit program all EBT cardholders are able to purchase goods and produce at participating Farmers Markets. If you’re a cardholder here is what you can expect when you head out to your local Farmers Market.

When you first arrive look for a table with a banner that reads “Use Your EBT Card Here”. Hand your card to the cashier and purchase as many $1 tokens as you need. While shopping, look for the market booths with an “EBT Tokens Accepted Here” sign. You do not have to use all of your tokens in one shopping trip. Unused tokens can either be refunded back onto your card or you can use them the next time you shop at your Farmers Market. Keep in mind that the tokens are market-specific and cannot be transferred between markets.

The overall experience of being at a Farmers Market is more enjoyable and the selection is always fresh and unique. What can you buy with your tokens? You can purchase everything from fruits and vegetables to freshly baked bread and dairy products. Sometimes meats, fish, and poultry are also available making it easy to plan dinner that night.

It’s not a bad idea to take note of your favorite vendors so you can go back and spend time with them during your next visit. The farmers and vendors are always willing to share recipes and preparation tips with their customers. They can keep you informed on what’s in season and what will be in the future. Making it more about the experience is beneficial to both you and the vendors. So take your time and enjoy!


What’s being picked this week:
Grapes, Beets, Cabbage, Broccoli, Beans, Zucchini, Peppers, Eggplant, Potatoes, Winter Squash, Onions, Raspberries, Collards, Kale, Apples, Brussel Sprouts

Recipes: Looking for a way to make your lunch exciting?

Photo Credit: Patrick Kuhl Via Flickr Creative Commons

Why Apples are the Eye of the Empire State

Empire, Cortland, Red Delicious, and McIntosh. Do these names sound familiar? If you grew up in the state of New York you’ve probably not only heard of these kinds of apples but you’ve probably consumed your fair share of them. The Empire State is known for offering the most varieties of apples in the United States. With about 700 growers throughout the state, it’s almost impossible to travel through the various regions without coming across an apple orchard.

There are many reasons why an apple a day can keep the doctor away. One medium-sized apple provides one-fifth of your daily dietary fiber, which promotes both cardiovascular and digestive health. They are an excellent source of energy and antioxidants. Apples are low calorie, delicious, and easy to eat on the go so they make for the perfect snack.

From apple pie to apple brown betty there are so many apple recipes and different ways to prepare apples, which often justifies buying them by the bushel. You know you’ll get good use out of them but either way, you can store apples up to about a month. The proper storage temperature is around 30-35 Degrees Fahrenheit and the best place to store them is in a refrigerator crisper drawer along with a dampened paper towel to create a humid environment.

After you’ve properly stored your apples start thinking of ways to utilize them throughout the fall months. Are you a baker? Cortland apples are one of the many varieties that are excellent for baking. Do your kids love applesauce? If you want to make homemade apple sauce Golden Delicious apples will require little to no added sugar to make it sweet. Most of the NY varieties are ok to freeze so you can enjoy them throughout the winter!

Can’t make it to an orchard? No problem. Often time’s your local farmers market will offer some of your fall favorites this time of year. Don’t forget to pick up some apple cider while you’re there. Buying apples locally will not only support a healthy diet but will also support a healthier economy. How do you like them apples?


What’s being picked this week:
Grapes, Kale, Apples, Brussel Sprouts, Beets, Cabbage, Broccoli, Beans, Zucchini, Tomatoes, Herbs, Peppers, Lima Beans, Eggplant, Potatoes, Squash, Sweet Corn, Blueberries, Raspberries, Okra, Collards

Recipes: The BEST Apple Pie for the NY Native

Photo CreditCarriagehouse2011 Via Flickr Creative Commons

How to Keep Your Produce Fresh: Shelf-Life 101

Everyone loves to enjoy fresh fruits and vegetables, but it can be difficult to keep produce fresh without spoiling. Each year, Americans dump $43 billion worth of spoiled food. To save your SNAP EBT benefits and the environment, use these tips to maximize your produce’s shelf-life and minimize waste.

Location of Produce
To lengthen the shelf-life of your produce, you must slow each food’s respiration using cold temperatures, typically using the refrigerator. Warmer temperatures speed up the rate of respiration. Some fruits release ethylene, a gas that speeds the rate of respiration and spoiling. To maximize your produce’s freshness:

  1. Refrigerate these ethylene releasers: Apples, Apricots, Cantaloupe, Figs, and Honeydew
  2. Do not refrigerate these ethylene releasers: Pears, Plums, and Tomatoes
  3. Keep these away from ethylene releasers: Broccoli, Brussel Sprouts, Cabbage, Carrots, Cauliflower, Cucumbers, Eggplant, Lettuce and other leafy greens, Parsley, Peas, Peppers, Squash Sweet Potatoes, and Watermelon

Always make sure to never store produce in airtight bags or containers, lack of airflow accelerates decay.

Secret Tips
Specific fruits and vegetables last the longest when stored in particular ways. For example, berries last longer when rinsed in a one-part vinegar, three-part water mixture. Some other tricks to fresh produce are:

  • Store lettuce in a bowl with a paper towel and a dash of salt. The paper towel and salt absorbs the moisture and wetness from the lettuce
  • Store carrots in a bowl of water and seal with plastic wrap to keep them moist
  • Wrap onions in pantyhose to allow the right amount of air to circulate to keep the vegetable fresh
  • Store apples with potatoes to keep your potatoes from sprouting
  • Soak apple slices in salt water to prevent them from browning
  • Wrap celery in aluminum foil to allow ethylene to escape

What to Eat First
Although storing your fruits with the correct vegetables and following these secret tips help lengthen your produce’s shelf-life, you still must eat more perishable produce first. Delicate fruits such as raspberries are never going to last regardless of your storing techniques. Follow this guide to know how to prioritize your produce:

Eat on Day 0 – Day 2: Artichokes, Asparagus, Basil, Broccoli, Cherries, Corn, Dill, Green beans, Mushrooms, Mustard greens, Strawberries, and Watercress

Eat on Day 3 – Day 5: Arugula, Cucumbers, Eggplant, Grapes, Lettuce, Lime, and Zucchini

Eat on Day 6 – Day 7: Apricots, Bell peppers, Blueberries, Brussel sprouts, Cauliflower, Grapefruit, Leeks, Lemons, Mint, Oranges, Oregano, Parsley, Pears, Plums, Spinach, Tomatoes, and Watermelon

Eat on Day 8+: Apples, Beets, Cabbage, Carrots, Celery, Garlic, Onions, Potatoes, and Winter squash


Check out what’s being picked this week*:
Grapes, Kale, Apples, Brussel Sprouts, Beets, Cabbage, Broccoli, Beans, Zucchini, Tomatoes, Herbs, Peppers, Eggplant, Potatoes, Squash, Sweet Corn, Raspberries, Okra & Collards

*Availability will vary by market due to differences in growing zones.

Recipe of the Week:
Looking for a last-minute side dish for dinner tonight? Try this recipe!

5 Charts to Show the Important of Farmers Markets in the Economy

Buying local at your farmers market with your EBT SNAP may not seem to have a large impact, but your purchases help the environment, local farmers, and the economy. Check out these 5 charts to learn how:

1. Farmers Markets stimulate local economies, preserve rural livelihoods, increase access to fresh food, and support healthy communities.


2. EBT SNAP benefits help employ farmers.


3. Buying local saves the environment and money.

Buy Local
Source: eLocal.com

4. It creates a positive food chain reaction for our communities.

Check out what is being picked this week*:
Collards, Beets, Cabbage, Broccoli, Beans, Zucchini, Tomatoes, Herbs, Peppers, Lima Beans, Eggplant, Potatoes, Squash, Sweet Corn, Blueberries, Pears, Raspberries & Okra

*Availability will vary by market due to differences in growing zones.

One Potato, Two Potatoes, Bad Potato, Good?

Did you know that potatoes are actually good for you? Sadly, most people assume they aren’t good for them and with good reason. The truth is America’s obsession with junk food is to blame for potatoes getting a bad rap. According to the USDA/NASS, approximately 65% of the potatoes consumed in the United States per year are in French Fry or Potato Chip form. Obviously, when you fry or process a potato and add fatty oils and high levels of sodium to them it’s going to do more harm than good.

Nutrition experts are trying to dispel the unhealthy potato myth by educating the public about the nutritional benefits of the potato. One medium baked potato gives us almost 30% or our daily-recommended value of both vitamin B6 and vitamin C. Potatoes are also high in both fiber and potassium which most of us do not get enough of on a daily basis. A baked potato is an excellent addition to a well-balanced meal if you go easy on the sodium and fatty toppings.

By now most of us are aware that we don’t have to sacrifice taste when it comes to eating healthy. Some alternative healthy toppings that go great on a baked potato are scallions, Greek yogurt, curry, tomato-pesto, salsa, low-fat sour cream, and chives. Can’t imagine your spud without butter and salt? Just remember less is more.

Don’t discard the skins. Eat them! Potato skins are packed with potassium, iron, and niacin. What does that mean for you? Potassium fuels your metabolism and assists in your muscle movement. Iron supports healthy red blood cells, which carry oxygen throughout your body. And Niacin or vitamin B3 is important for healthy new cell development and assists in recovering from stress.

Recently, the Institute of Medicine put white potatoes back on the eligibility list for the WIC program. They discovered that women and children weren’t meeting the recommended daily intake of starchy vegetables and potatoes are a simple and beneficial solution.

For all of you spud fans it’s time to bring the potato back into your diet. Remember, the potato on its own is healthy, just be aware of how it’s been prepared and what’s on top of it.


Check out what’s being picked this week*:
Raspberries, Okra, Beets, Cabbage, Broccoli, Beans, Zucchini, Cucumbers, Tomatoes, Herbs, Peppers, Lima Beans, Eggplant, Potatoes, Squash, Sweet Corn, Blueberries, Pears

*Availability will vary by market due to differences in growing zones.

Recipe of the Week: Here’s a great way to load up your baked potato without the added fat and calories: Try this recipe!

Photo CreditNick Saltmarsh Via Flickr Creative Commons

What the Farmers Market Means to Me: A Farmer’s Point of View

I am up before the local morning news begins. I don’t commute in morning traffic. I don’t punch a time card. I don’t have a boss checking his watch when I arrive at work. I don’t show up at an office wearing expensive suits. I don’t have an IT department to call when something goes wrong in fact most of my co-workers walk on four legs.

I am a farmer. My family depends on me and you depend on me. No time for sick days or sleeping in. I don’t do my job for the pay or notoriety I do it to fulfill my passion for the land, growing, and agriculture. Without that passion I could not do it. My job is hard but I wouldn’t have it any other way.

One of my favorite days of the week is the day I show up at your local Farmers Market. I can’t wait to show you the beautiful beets, berries or broccoli I just harvested. I look forward to our conversations about what’s in season and the best way to prepare or preserve your produce.

In an era where fast food is prevalent I am proud to make you aware of nutritious and delicious options.

I chuckle when I hear the phrase farm to table. I’ve been doing that for years! I’m excited that our country is seeing the value in farm fresh food and that eating organic is trendy. I want you to be healthy. I want you to reap the benefits of my labor. I love the opportunity to present it to you personally.

I’m thankful that SNAP Benefits are accepted at local Farmers Markets. I believe everyone should have access to farm fresh food. I love witnessing all families enjoying the opportunity to spend a beautiful day at the market, watching children pick out the vegetables they will eat for dinner that night, and knowing that I have helped that family to eat good tasting and healthy local food.

If I’ve never met you at the Farmers Market I invite you to come see me soon. Between my fellow vendors and myself there is something for everyone. I can almost guarantee it will change your perception of grocery shopping and what it means to buy local. I look forward to meeting you and I thank you in advance for supporting me, your local farmer.

What’s being picked this week: Pears, Beets, Cabbage, Kale, Lettuce, Swiss Chard, Broccoli, Beans, Zucchini, Cucumbers, Tomatoes, Herbs, Peppers, Lima Beans, Eggplant, Potatoes, Squash, Sweet Corn, Blueberries

Recipes: Looking for a healthy snack? Try these salsas!

Photo CreditUnited Soybean Board Via Flickr Creative Commons

4 Reasons to Support Your Local Farmers Market

The NY Farmers Market EBT SNAP program has made it possible to bring home local nutritious food using your EBT SNAP benefits. Although it may be easier to use your EBT SNAP benefits card at your local supermarket, consider using your benefits at the farmers market. Here are four reasons why you should support your local farmers market.

1. The Best of the Best
At the farmers market, you will be able to select from the freshest and tastiest produce. Because the fruits and vegetables are local, they are able to fully ripen in the field unlike produce sold in the supermarket which may be picked before ripening and sit in storage. The farmers market offers a variety of produce which no supermarket can compare. Vegetables like red carrots and purple cauliflower are unique to farmers markets and will not be found at Wal-Mart.

2. Protect the Environment
When you purchase produce from the farmers market, you are helping the environment. Many do not realize there is a large environmental toll when you buy supermarket produce. According to the Center for Urban Education about Sustainable Agriculture, food travels an average of 1,500 miles to reach your kitchen table. Shipping food burns large amounts of fossil fuels that contribute to pollution. Whereas local produce travels much shorter distances. Buying local also gives you the benefit of knowing where your food came from.

3. Farmers Know Best
It is unusual for supermarket employees to stand around the produce section offering cooking tips. At the farmers market, this is the norm. Farmers are passionate about food and because they grew it, are experts on how to cook it. Many offer advice about their produce accompanied by recipes. Not only will you leave the farmers market with fresh quality produce, but you may also leave some great meal ideas and cooking tips.

4. Support and Connect with Your Community
The farmers market is more than a place to buy local, it is a community experience. Families come to enjoy the market, learn about fresh food, and connect with their community. Buying from the farmers market supports other families like yours. Family farmers are struggling to keep up with agribusiness and need community support. At the farmers market, farmers can get a better return on their produce then from selling to distributors.

Talk to your friends and family! Share with them why it is important to shop and support our local farmers markets.

Check out what is being picked this week*:
Squash, Sweet Corn, Blueberries, Beets, Cabbage, Kale, Lettuce, Swiss Chard, Broccoli, Beans, Zucchini, Cucumbers, Tomatoes, Herbs, Blackberries, Peppers, Eggplant & Potatoes

*Availability will vary by market due to differences in growing zones.

Be Cool this Summer with Cucumber Facts: The Basics of Preparing and Storing Cucumbers

When shopping at your local farmers market this summer with your EBT SNAP benefits, impress your friends and family with your cucumber knowledge. Read below to become an expert on everything cucumbers, from preparing them to storing them.

What is a Cucumber?

Cucumbers are the fourth most widely cultivated “vegetable” in the world. Technically, cucumbers are fruits because they grow from the ovaries of flowering plants, but most people still refer to them as vegetables. Cucumbers can come in a variety of shapes, colors and sizes. They fall into two main categories: slicing cucumbers and pickling cucumbers. Slicing cucumbers are intended for fresh consumption and pickling cucumbers are intended to be pickled.

Health Benefits of Cucumbers

Cucumbers are 90% water and contain multiple health benefits. They contain vitamin K, vitamin C, vitamin B5 and valuable minerals including manganese, potassium, and magnesium. Three types of phytonutrients (flavonoids, lignans, and triterpenes) can also be found in cucumbers which provide anti-inflammatory benefits.

Picking the Perfect Cucumber

When looking for the perfect cucumber at the farmers market, check for firmness. A cucumber should be firm, rounded on the edges, and medium to dark green in color. Stay away from yellow puffy cucumbers or ones with bruised areas. If you’re not a fan of seeds in your cucumbers, look for thin-skinned cucumbers which have less seeds.

Preparing Cucumbers

Slicing cucumbers are best served fresh and raw, but they can also be sautéed, fried, or even mixed in drinks. Cucumbers contain most of their nutrients in their seeds and their skin. It is advised, from a nutritional standpoint, to eat cucumbers with both. However, cucumbers have wax coatings on their skin. Organically grown cucumbers have non-synthetic waxes where conventionally grown cucumbers may have synthetic waxes and pesticides. If you choose to eat the skin, buy organic cucumbers to eliminate the risk of synthetic wax consumption. If buying organic is not an option, then thoroughly wash each cucumber with a brush or simply remove the skin before eating.

Pickling Cucumbers

Pickling cucumbers are designed to be pickled. Pickling refers to a method of preserving goods by soaking them in a liquid. The basic type of pickling is fermenting which is when cucumbers soak in varying solutions for an extended period of time. It is very easy to pickle your cucumbers at home. Pickling kits are typically sold at grocery stores.

Storing Cucumbers

To maximize your cucumbers’ freshness, store them at room temperature. Cucumbers are very sensitive to the sun so keep them out of direct sunlight or heat. Cucumbers are also highly reactive to ethylene, a plant hormone which initiates ripening in fruits and vegetables. To prevent this process from affecting your cucumbers, store them away from bananas, melons and tomatoes.

Check out what is being picked this week*:

Rhubarb, Beets, Cabbage, Kale, Lettuce, Swiss Chard, Onions, Broccoli, Beans, Zucchini, Cherries, Raspberries, Cucumbers, Tomatoes, Herbs, Blackberries, Peppers, Lima Beans, Eggplant, Potatoes, Peaches & Nectarines

*Availability will vary by market due to differences in growing zones.